Create stunning photo collages on wood with our easy tutorial! Discover how to transfer your favorite images onto wood for a unique and personalized touch to your home decor. Get creative and add a rustic charm to your photos with this fun and crafty technique.

Creating Stunning Photo Collage on Wood: A Unique Way to Display Your Memories
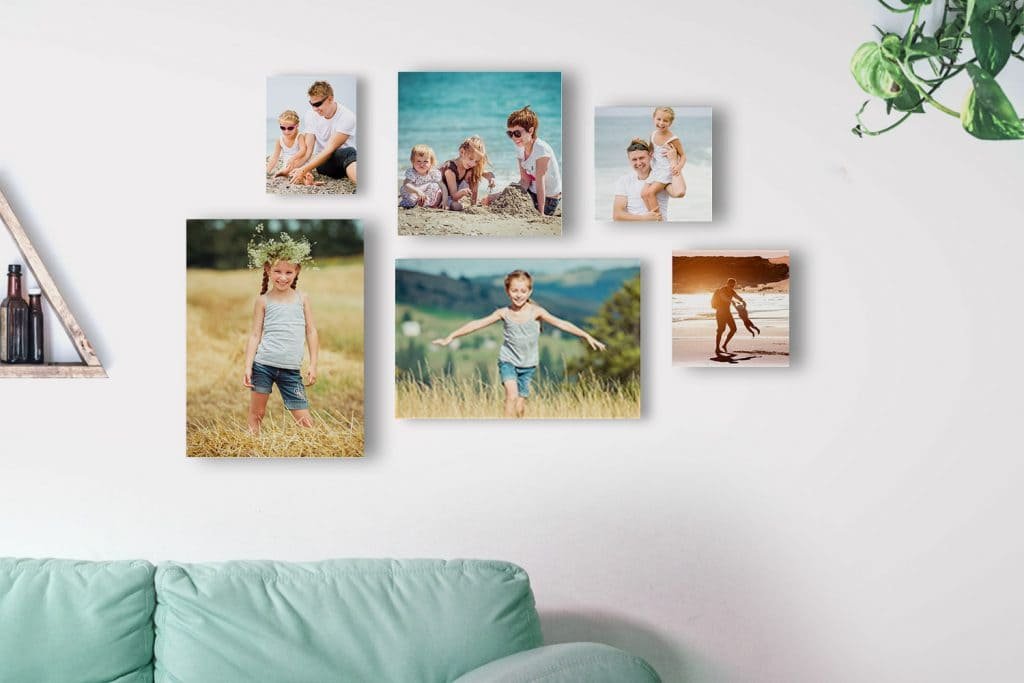
Creating Stunning Photo Collage on Wood: A Unique Way to Display Your Memories is a creative and personalized way to showcase your favorite photographs. By transferring your images onto wooden panels, you can add a rustic and unique touch to your home decor. This technique allows you to create a one-of-a-kind piece of art that tells a story and captures precious moments. Whether you want to display family portraits, travel memories, or artistic compositions, a photo collage on wood can be a standout feature in any room. Enhance your space with this innovative and visually appealing method of preserving and showcasing your memories.
How To : Mount Photo Prints to Wooden Panels
The SUPER EASY Way to Make a Wood Picture Frame – Using Trim Molding!
How can I collage photos on wood?
To collage photos on wood, you will need the following materials:
- Wooden surface: Choose a smooth wooden board or panel as your base for collaging.
- Mod Podge or similar adhesive: This will be used to adhere the photos to the wood.
- Photos: Collect the photos you want to use in your collage and print them out in the desired sizes.
- Scissors or craft knife: To cut the photos to fit your collage layout.
- Brushes: Use foam brushes or paintbrushes to apply the adhesive.
- Other decorative elements: Consider adding embellishments such as stickers, paper cutouts, or markers to enhance your collage.
Here are the steps to collage photos on wood:
1. Prepare the wooden surface: Sand the wood to create a smooth and clean surface for collaging.
2. Arrange your photos: Lay out your photos on the wood to plan the layout of your collage.
3. Adhere the photos: Using Mod Podge or a similar adhesive, apply a thin layer to the back of each photo and press it onto the wood surface.
4. Smooth out any air bubbles or wrinkles: Use a brayer or your fingers to ensure that the photos are securely adhered to the wood and free of imperfections.
5. Allow the collage to dry: Let the collage dry completely according to the instructions on the adhesive you used.
6. Seal the collage: Once the collage is dry, you can seal the photos and protect them by applying a top coat of Mod Podge or a clear varnish over the entire surface.
By following these steps, you can create a beautiful photo collage on wood that can be displayed and enjoyed for years to come.
How can pictures be transferred onto wood?
Transferring pictures onto wood is a popular technique in photo collage projects. Here’s how you can do it:
1. Gather your materials: You will need a piece of wood, a laser-printed image on regular printer paper (not inkjet), gel medium, a brush, and a credit card or similar item.
2. Prepare the wood: Start by sanding the wood to create a smooth surface for the image transfer.
3. Apply the gel medium: Using a brush, apply a generous layer of gel medium to the front of the printed image. Make sure to cover the entire surface evenly.
4. Place the image on the wood: Carefully place the image face down onto the wood, making sure it is positioned correctly.
5. Smooth out any air bubbles: Use a credit card or similar item to gently smooth out any air bubbles and ensure good contact between the paper and wood.
6. Let it dry: Allow the gel medium to dry completely. This usually takes a few hours, but it’s best to leave it overnight to ensure it has fully set.
7. Remove the paper: Once the gel medium is completely dry, use a damp cloth to wet the paper. Gently rub the paper with your fingers to remove it, revealing the transferred image on the wood.
8. Seal the image: To protect the transferred image, you can seal it with a clear varnish or sealant.
Following these steps will help you successfully transfer pictures onto wood for your photo collage projects.
How to glue photos on wood?
To glue photos on wood for a photo collage, follow these steps:
1. Choose the right adhesive: Use a strong and durable adhesive that is suitable for both paper and wood. Mod Podge, gel medium, or a strong craft glue are good options.
2. Prepare the wood surface: Sand the wood surface lightly to create a rough texture. This will help the adhesive bond better with the wood.
3. Arrange your photos: Arrange your photos on the wood surface in the desired layout before you start gluing. This will help you visualize the final collage before committing to gluing them down.
4. Apply the adhesive: Using a brush or a foam roller, apply a thin, even layer of adhesive to the back of each photo. Make sure to coat the entire back of the photo to ensure it sticks properly.
5. Press the photos onto the wood: Carefully place each photo onto the wood surface in the desired position. Press down firmly on each photo to remove any air bubbles and ensure a strong bond.
6. Seal the collage: Once all the photos are glued down, apply a top coat of adhesive over the entire surface of the collage. This will help seal the photos and protect them from damage.
7. Let it dry: Allow the collage to dry completely according to the adhesive manufacturer’s instructions before handling or displaying it.
By following these steps and using the right adhesive, you can create a beautiful photo collage on wood that will last for years to come.
How do I add pictures to wooden letters?
To create a photo collage with pictures on wooden letters, you can follow these steps:
1. Choose your wooden letters: Select the wooden letters that you want to decorate with photos. You can find wooden letters at craft stores or online.
2. Print out your photos: Print out the photos you want to use on the wooden letters. Make sure the size of the photos matches the size of the wooden letters.
3. Cut out the photos: Carefully cut out the photos following the shape of the wooden letters. You can use scissors or a craft knife for precision.
4. Attach the photos to the wooden letters: Use a strong adhesive like Mod Podge or glue to attach the photos to the wooden letters. Make sure to press down firmly to ensure the photos stick properly.
5. Let it dry: Allow the adhesive to dry completely before displaying or hanging up your photo collage wooden letters.
6. Display your creation: Once the photos are securely attached to the wooden letters, you can display them on a wall, shelf, or mantelpiece to showcase your personalized photo collage.
By following these steps, you can create a unique and personalized photo collage using wooden letters as a creative canvas for your pictures.
Frequent Questions
How can I create a photo collage on wood?
You can create a photo collage on wood by printing your photos on tissue paper and transferring them onto the wood using gel medium.
What materials do I need to make a photo collage on wood?
You will need wood as the base, mod podge, printed photos, scissors, paintbrush, and sealer to make a photo collage on wood.
Is it possible to preserve a photo collage on wood for a long time?
Yes, it is possible to preserve a photo collage on wood for a long time with proper sealing and UV protection.
In conclusion, creating a photo collage on wood is a unique and creative way to display your memories and artwork. The combination of natural wood textures and printed photographs adds a rustic yet modern touch to any space. Whether you’re looking to decorate your home or give a thoughtful gift, this DIY project is sure to impress. So gather your favorite photos, grab some wood pieces, and start crafting your own photo collage on wood today!