Discover how to create stunning DIY photo collages with easy and creative techniques. Embrace your inner artist and turn your favorite memories into beautiful works of art. Follow our step-by-step guide and unleash your creativity in this fun and fulfilling process.

Create Stunning DIY Photo Collages: Tips and Tricks for Beginners
Welcome to the world of creating photo collages! Whether you’re looking to preserve memories, showcase your creativity, or simply have fun, DIY photo collages are a fantastic way to bring your images to life. Here are some tips and tricks to help beginners get started:
1. Choose a Theme: Before you begin, think about the overall theme or story you want your collage to convey. This will help guide your selection of photos and design elements.
2. Select Your Photos: Gather a variety of photos that fit your chosen theme. Don’t be afraid to mix and match different styles and subjects for an interesting collage.
3. Experiment with Layouts: Play around with different arrangements of your photos until you find a layout that you love. Consider using free online tools or software to help you visualize the final result.
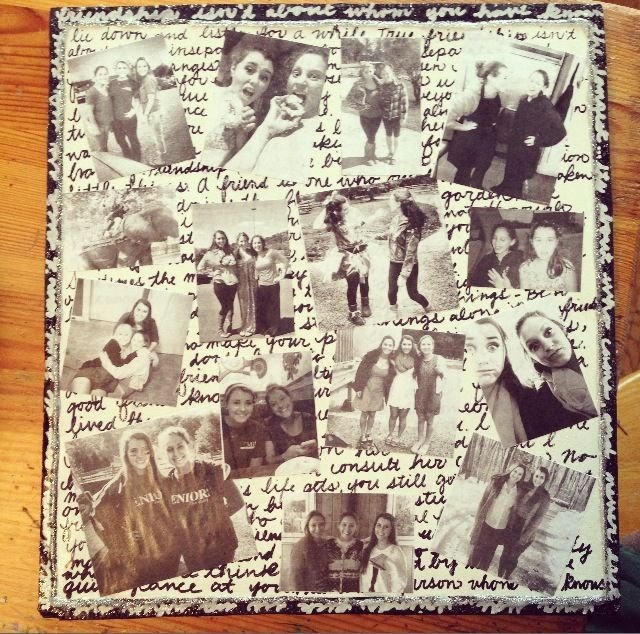
4. Add Text and Graphics: Personalize your collage by including text, quotes, or graphics that complement your photos. Be creative and don’t be afraid to try new ideas.
5. Pay Attention to Details: Pay close attention to details such as alignment, spacing, and color coordination to create a polished and professional-looking collage.
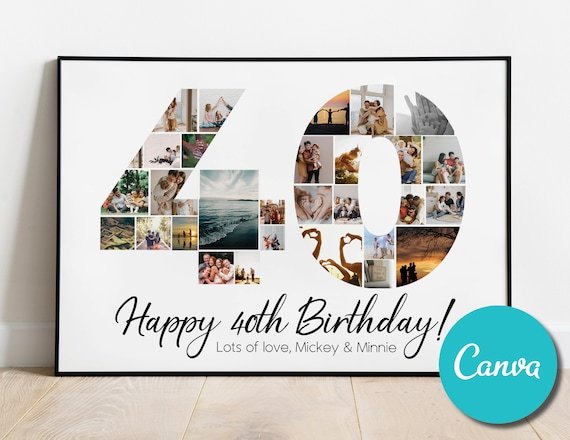
6. Print and Display: Once you’re happy with your collage, consider printing it out and displaying it in a frame, on a canvas, or as a digital wallpaper.
Remember, creating photo collages is all about experimentation and having fun. Don’t be afraid to make mistakes and try new techniques along the way. Enjoy the process and let your creativity shine!
Watch this for collage inspiration | 15 whimsical surreal collages in 15 minutes
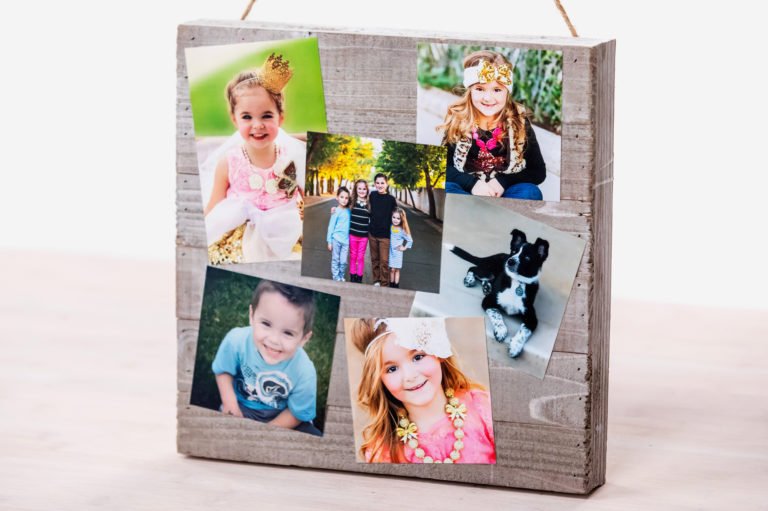
How To Transfer A Picture To Wood
How can I create my own photo collage?
To create your own photo collage, follow these steps:
1. Choose a collage maker: There are various online tools and apps available that make it easy to create a photo collage. Some popular options include Canva, PicCollage, and Adobe Spark.
2. Select your photos: Choose the photos you want to include in your collage. Consider selecting images that have a similar theme or color scheme for a cohesive look.
3. Decide on a layout: Most collage makers offer a range of layout options, from classic grids to more creative designs. Pick a layout that suits your style and the number of photos you want to include.
4. Customize your collage: Add effects, filters, text, and stickers to enhance your collage. Play around with different customization options to make your collage unique.
5. Arrange your photos: Drag and drop your photos into the collage layout. Experiment with the placement and size of each image until you’re happy with the overall composition.
6. Finalize and save: Once you’re satisfied with your collage, save it in a high-resolution format. You can then print it out, share it on social media, or use it as a digital wallpaper.
Creating a photo collage is a fun and creative way to showcase your favorite memories. Experiment with different layouts and customization options to make a collage that truly reflects your style and personality.
What is the free program to create photo collage?
PicCollage is a popular free program to create photo collages. It is available for both iOS and Android devices, making it easy to create collages on the go. With PicCollage, you can choose from a variety of templates, stickers, backgrounds, and fonts to customize your collage. It’s user-friendly interface makes it a great option for beginners looking to create beautiful collages with their photos.
How can I create a collage of pictures as one single picture?
To create a collage of pictures as one single picture, you can use various photo editing software or online tools. Here’s a simple guide to help you achieve this:
1. Select your photos: Choose the images you want to include in your collage. Make sure they are of similar resolution and quality for a cohesive look.
2. Choose a collage template: Most photo editing software and online collage makers offer a variety of templates to arrange your photos. Pick a layout that suits your vision for the collage.
3. Import your photos: Upload the selected images into the collage tool or software. Arrange them within the template to create your desired composition.
4. Adjust layout and spacing: Drag and drop your photos within the template to adjust their positions and sizes. Ensure there is uniform spacing between each image for a balanced look.
5. Add effects or filters (optional): Enhance your collage by applying effects, filters, or borders to the individual photos or the entire composition. Experiment with different styles to personalize your creation.
6. Save or export your collage: Once you are satisfied with the layout and design, save your collage as a single image file. Choose a high-resolution format to preserve the quality of your work.
7. Share or print your collage: You can now share your collage on social media, print it as a physical copy, or use it for any other creative purpose.
By following these steps, you can create a visually appealing collage of pictures as one single picture. Experiment with different layouts, styles, and effects to make your collage unique and engaging.
How to make a photo frame collage at home?
To make a photo frame collage at home, follow these steps:
1. Gather your materials: You will need a variety of photo frames in different sizes and styles, as well as the photos you want to display.
2. Plan your layout: Before you start hanging frames, lay them out on a large table or on the floor to experiment with different arrangements until you find one that you like.
3. Prepare the wall: Clean the wall where you plan to hang the collage and use a level to mark the area where each frame will go.
4. Hang the frames: Start by hanging the largest frame in the center and then work your way outwards with smaller frames. Use a hammer and nails or adhesive strips to securely attach the frames to the wall.
5. Add your photos: Once all the frames are hung, carefully insert your photos into each frame. Make sure to adjust the positioning of the frames as needed to achieve a balanced look.
6. Final touches: Stand back and assess the collage from a distance to make any final adjustments. Enjoy your personalized photo frame collage!
By following these steps, you can create a beautiful and unique photo frame collage right in your own home.
Frequent Questions
Can I use digital photos to create a DIY photo collage?
Yes, you can use digital photos to create a DIY photo collage.
What are some unique ways to display a photo collage in my home?
One unique way to display a photo collage in your home is by creating a gallery wall with different sized frames to mix and match photos.
Are there any online tools or apps that can help me design a personalized photo collage?
Yes, there are online tools and apps that can help you design a personalized photo collage.
In conclusion, DIY photo collages are a creative and personal way to showcase your memories and artistic flair. Whether you choose to create a physical collage or a digital one, the possibilities are endless. Let your imagination run wild and experiment with different layouts, styles, and themes to create a unique piece of artwork that truly reflects your personality. So gather your favorite photos, pick up some supplies, and start crafting your very own custom photo collage today!