Looking to add a personal touch to your Christmas tree this year? Get ready to create stunning DIY photo Christmas ornaments that will make your holiday season even more memorable. From cherished family photos to festive snapshots, these ornaments are sure to bring joy and nostalgia to your decorations. Let’s get crafting!

DIY Photo Christmas Ornaments: Personalized Holiday Memories
This holiday season, why not add a personal touch to your Christmas tree with DIY photo ornaments? These ornaments not only make great decorations, but also serve as wonderful keepsakes that capture your holiday memories for years to come. Get creative with your favorite photos, trinkets, and embellishments to create unique ornaments that showcase the spirit of the season. Whether you’re making them for yourself or as gifts for friends and family, DIY photo Christmas ornaments are a festive and heartfelt way to celebrate the most wonderful time of the year.
Viewer Gift Idea: How to Make a DIY Photo Ornament
PHOTO ORNAMENT DIY | Easy Holiday Decor idea
How can you create your own Christmas ornaments using pictures?
To create your own Christmas ornaments using pictures, you can follow these steps:
1. Select the photos you want to use for your ornaments. These can be family photos, holiday images, or any other pictures that are meaningful to you.
2. Print the photos onto high-quality paper or photo paper. Make sure the size of the photos is suitable for the ornaments you want to create.
3. Cut out the photos in the desired shape for your ornaments. You can use cookie cutters or stencil shapes to trace and cut the photos.
4. Add embellishments such as glitter, sequins, or stickers to decorate the photos and make them more festive.
5. Attach a ribbon or string to the top of the photo ornament to hang it on the Christmas tree or around the house.
6. Seal the photos with a clear sealant spray to protect them and ensure they last for years to come.
7. Display your homemade photo ornaments on the Christmas tree, in wreaths, or as gift tags for presents to add a personal touch to your holiday decor.
Creating your own Christmas ornaments using pictures is a fun and creative way to personalize your holiday decorations and cherish special memories during the festive season.
How can I transfer a picture onto an ornament?
To transfer a picture onto an ornament, you can follow these steps:
1. Select the picture: Choose a high-quality image that you want to transfer onto the ornament. Make sure it is the right size and resolution for the ornament.
2. Print the picture: Use a color printer to print the image onto special transfer paper or decal paper specifically designed for transferring images onto surfaces like ornaments.
3. Prepare the ornament: Clean the surface of the ornament where you will be transferring the picture. Make sure it is free of dust, dirt, or any other debris that could affect the transfer.
4. Transfer the picture: Cut out the printed image as close to the edges as possible. Place the image face down onto the ornament and secure it in place with tape or adhesive.
5. Apply heat: Use a heat source, such as a heat press, iron, or hairdryer, to apply heat to the back of the transfer paper. Follow the instructions that come with the transfer paper for the correct temperature and duration of heat application.
6. Peel off the paper: After applying heat, carefully peel off the transfer paper to reveal the transferred picture on the ornament. Be gentle to avoid damaging the image.
7. Seal the image: To protect the transferred picture and ensure it lasts longer, consider sealing it with a clear sealant or Mod Podge. This will help to prevent the image from fading or scratching.
8. Final touches: Once the picture is transferred and sealed, add any additional decorations or embellishments to personalize the ornament further.
By following these steps, you can easily transfer a picture onto an ornament and create a unique and personalized Christmas decoration.
How can a picture be printed on an ornament?
To print a picture on an ornament for Christmas Photo, you can follow these steps:
1. Select an ornament: Choose a flat surface ornament such as a ceramic or metal disc, ball, or star shape that has a smooth and even surface for the best printing results.
2. Prepare the image: Make sure the picture you want to print is of high resolution and the correct size for the ornament. Edit the image as needed to fit the shape of the ornament and enhance its colors if necessary.
3. Print the image: Use a printer that is suitable for printing on special materials like ornaments. Specialized printers or printing services may offer better results than regular home printers.
4. Transfer the image: There are different methods to transfer the image onto the ornament, such as using sublimation printing, heat transfers, or decal paper. Follow the specific instructions for the chosen method carefully.
5. Seal the image: Once the picture is printed on the ornament, seal it with a clear sealant or resin to protect the image from fading, scratching, or other damages over time.
By following these steps, you can create a personalized ornament with a printed picture that adds a special touch to your Christmas decorations.
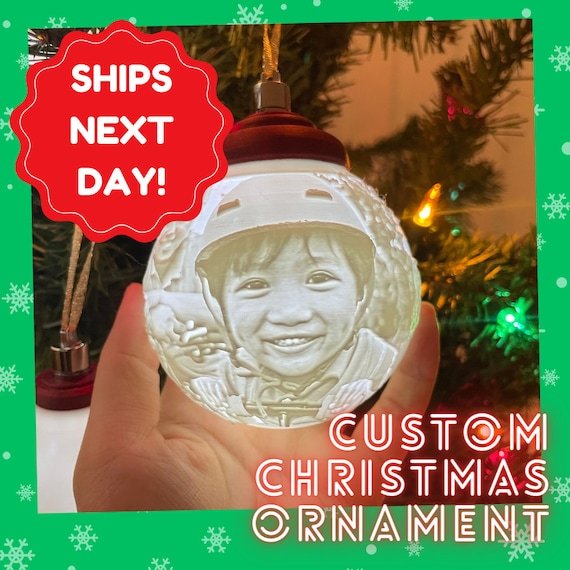
How can a picture be placed inside an ornament ball?
To place a picture inside an ornament ball, you will need a clear glass or plastic ornament that opens in half. Follow these steps:
1. Select a picture: Choose a photo that will fit inside the ornament. It’s best to use a small picture so it doesn’t get distorted when placed inside.
2. Print and cut the picture: Print the picture on photo paper or regular paper, making sure it’s the right size to fit inside the ornament. Cut out the picture carefully.
3. Prepare the ornament: Open the ornament ball carefully and make sure it’s clean inside. You can also add some glitter or other embellishments if desired.
4. Insert the picture: Carefully place the picture inside the ornament ball. You can use tweezers or a small stick to adjust the picture and make sure it’s positioned nicely.
5. Close the ornament: Gently close the ornament ball, making sure it seals properly. Some ornaments may require a decorative cap or hook to secure the closure.
6. Add a ribbon or hook: Attach a ribbon or hook to the top of the ornament so it can be hung on the Christmas tree or displayed.
7. Personalize: You can further personalize the ornament by adding names, dates, or other decorations on the outside using paint, markers, or stickers.
This DIY project can make a lovely personalized ornament for your Christmas tree or a heartfelt gift for someone special.
Frequent Questions
How can I create DIY photo Christmas ornaments?
To create DIY photo Christmas ornaments, you can use materials like clear ornaments, photos, Mod Podge, and glitter. Cut your photos to fit inside the ornament, glue them on, add some glitter for decoration, and let it dry before hanging on your tree.
What materials do I need to make photo ornaments for Christmas?
You will need photo prints, scissors, cardstock or chipboard, glue, ribbon, and decorative embellishments to make photo ornaments for Christmas.
Are there any tips for getting the best results when making personalized photo Christmas ornaments?
Yes, choose high-quality photos with good resolution, keep the design simple and clear, and consider using festive colors and themes for the best results when making personalized photo Christmas ornaments.
In conclusion, DIY photo Christmas ornaments are a wonderful way to add a personal and heartfelt touch to your holiday decor. From family photos to memorable snapshots, these ornaments can help cherish special moments for years to come. Get creative and make your own unique ornaments that will surely bring joy and nostalgia to your holiday season. Happy crafting and Merry Christmas!